Homemade Cottage Cheese with Lemon Juice
Making our own homemade cottage cheese with the help of a bit of lemon juice could not be easier to do! This is ready in under an hour and you'll have a great breakfast option ready for easy meals.
Equipment
- 1 piece of cheese cloth for straining cheese; you can also use a nut milk bag
- 1 slotted spoon for separating the cheese curds from the whey
- 1 wooden spoon
- 1 large colander
- 1 food thermometer to measure temperature during the warming process
- 1 airtight storage container for storing the cottage cheese once prepped
- 2 large bowls one for straining; one for preparing cottage cheese for transfer to storage container
Ingredients
- ½ gallon of whole milk you can also use low-fat or non-fat milk
- 6 tablespoons fresh lemon juice you can also use distilled white vinegar or bottled lemon juice
- Pinch of kosher salt to taste
- 2 tablespoons heavy cream optional
Instructions
- Pour the milk of your choice into a large heavy bottomed pot or dutch oven. Warm the milk to approximately 190 degrees Fahrenheit. Using a wooden spoon, gently stir milk occasionally so it doesn't burn on the bottom of the pot.
- Once milk is heated to temperature, remove from heat. If you remove it prematurely, your cheese may not curdle. A temperature of between 180 and 190 degrees works well in order to support cheese curdling.
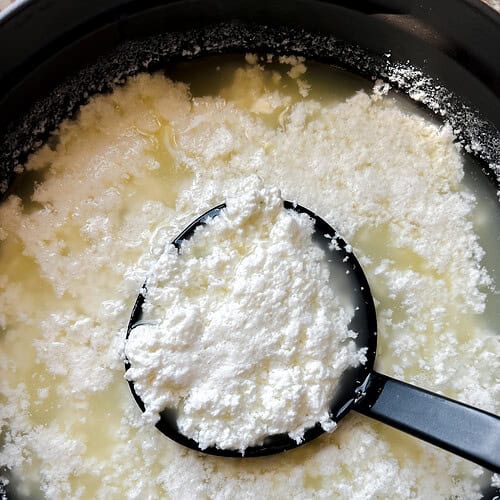
- Add the 6 tablespoons of lemon juice to the warmed milk and stir using the wooden spoon. You should start to see the milk curdle immediately. Once curdling begins, cover the dutch oven with its lid and let milk mixture rest for approximately thirty minutes.
- While the milk curdles, prep your straining apparatus by lining a colander with cheese cloth or a nut milk bag. Place the colander over a large bowl just in case anything drips out when you drain the cheese solids.
- Using a slotted spoon, scoop out the cottage cheese solids from the pot into the cheesecloth lined colander. Allow the cottage cheese solids to drain into the bowl for approximately 10 minutes or until the dripping has slowed down. If you don't have a slotted spoon, you can use a normal spoon but the draining process may take a bit longer.
- Once your cheese is drained, gather the ends of your cheesecloth or nut milk bag and begin wrapping the cheese into a ball tightly. Hold the ball in one hand and run cold water over it while squeezing it gently with your other hand. This will help to cool the cottage cheese solids evenly as you squeeze out any remaining liquid.
- Place the ball of strained cheese curds into a clean bowl. Use a wood spoon to break up the cottage cheese curds into smaller curds to your desired size. Season to taste with kosher salt. I like to start with about ¼ teaspoon and build from there. It honestly does not need a lot of salt.
- If you want creamier texture to your homemade cottage cheese, add in a couple tablespoons to the mixture. Give it a gentle stir until it reaches the desired consistency. If you want to add more cream, add in a tablespoon more each time between stirs.
- Once your cottage cheese is at the texture and taste you like, transfer it to the storage container of choice. Chill your cottage cheese for at least an hour before serving. Your homemade cottage cheese is best if eaten within 7 days. If using milk that is about to spoil, consume the cottage cheese within 3 to 5 days. Signs of spoilage include: foul odors, signs of mold, or a very sour bitter taste.
Tried this recipe?Let us know how it was!