These Guava and Cream Cheese Pastries, or Pastelitos, are an ode to my mom, who loves these guava and cream cheese pastries from the local panaderia or Mexican bakery. Layers of guava and cream cheese are filled between sheets of puff pastry and baked until golden. Is there anything more delicious?
This recipe is incredibly easy, especially since we use store bought puff pastry here. Make this using the guava paste recipe on a previous blog post here and you can have these delicious bakery quality treats on hand anytime!

What You'll Need (Ingredients)
The ingredient list here is very simple. What you'll need:
- Puff pastry (I love this one from Dufour Pastry Kitchens and when it's on sale at Whole Foods I stock up!)
- Cream cheese
- Guava paste (either prepared from this recipe or you can use store bought)
- Egg for egg wash
- Turbinado sugar
- Vanilla extract + cinnamon
I wanted to amp up the flavor of the cream cheese to offer a subtle sweetness paired with the tasty guava paste we made. I really loved the addition of vanilla and cinnamon here. It worked beautifully.

Step by Step Assembly
To start forming your guava and cream cheese pastries:
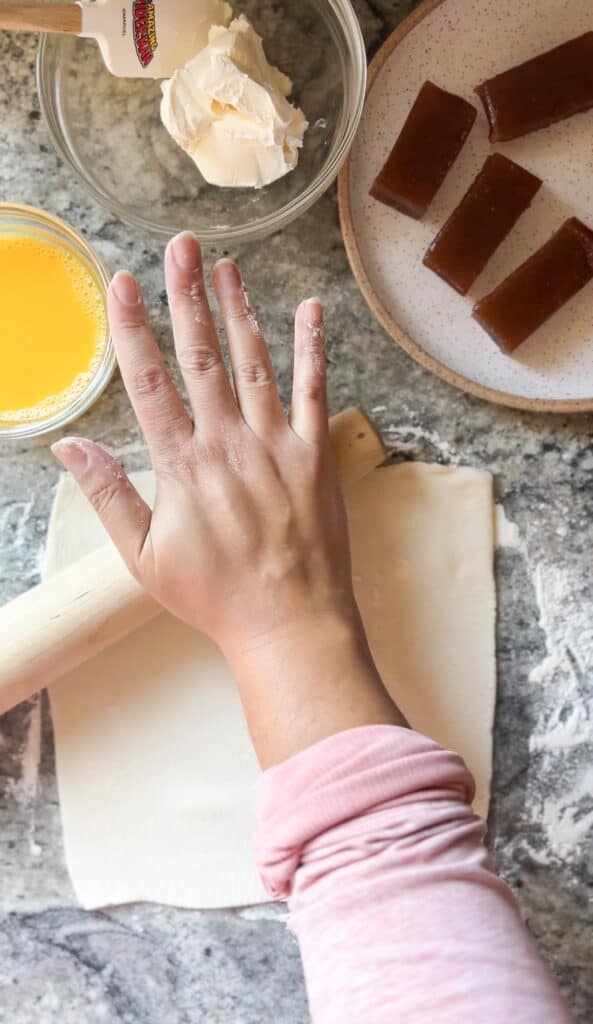
- Roll out the thawed puff pastry dough on a lightly floured surface. You'll want to roll one sheet of puff pastry into an 8-by-12-inch rectangle, about the size of a standard sheet of paper.
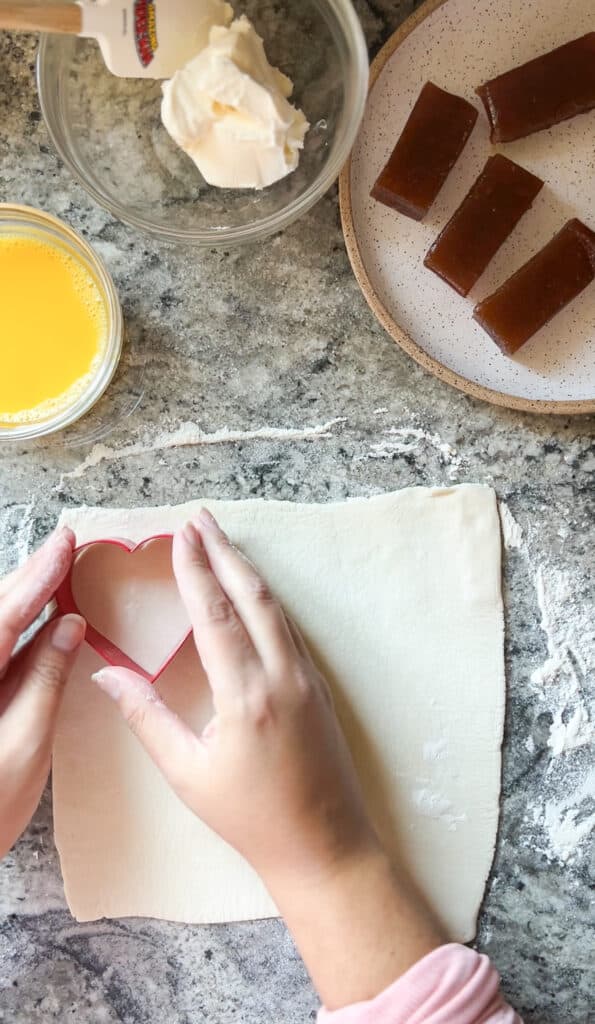
- If using cookie cutters, cut out your desired shapes and set aside on the parchment lined baking sheet. Here, I used a heart shaped cookie cutter for Valentine's Day, but you do not need to do this.
- If not using cookie cutters, use a sharp knife or pizza cutter and slice the pastry into 8 rectangles, measuring approximately 3 x 4 inches (it’s okay if it’s not exact, just an estimate here).
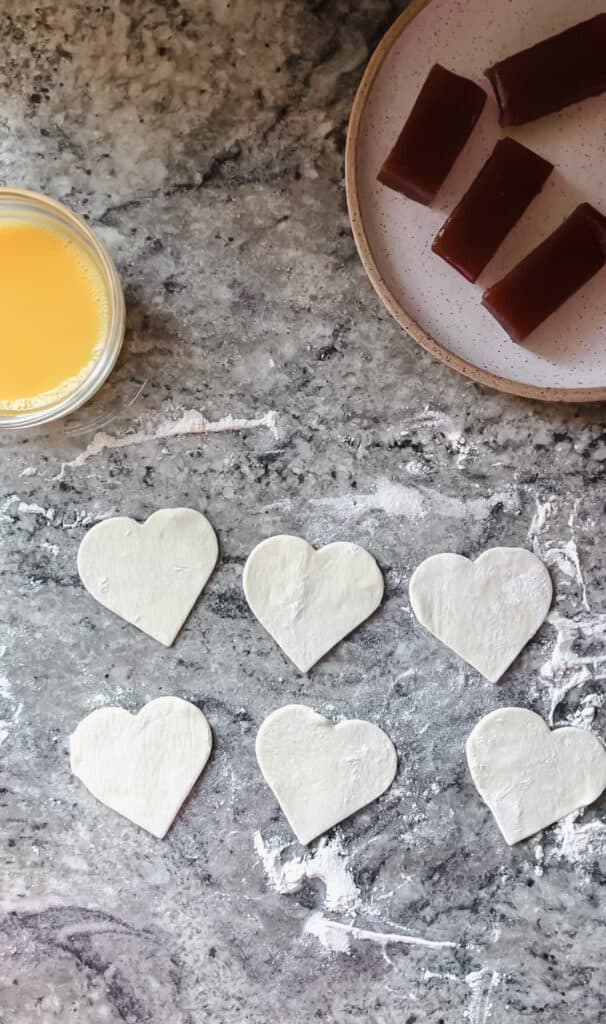
- Place the cut puff pastry onto your parchment lined baking sheet. These will be the bottom layer of your puff pastry for the pastelitos.
Filling Your Guava and Cream Cheese Pastries
Once you've cut your pastry dough:
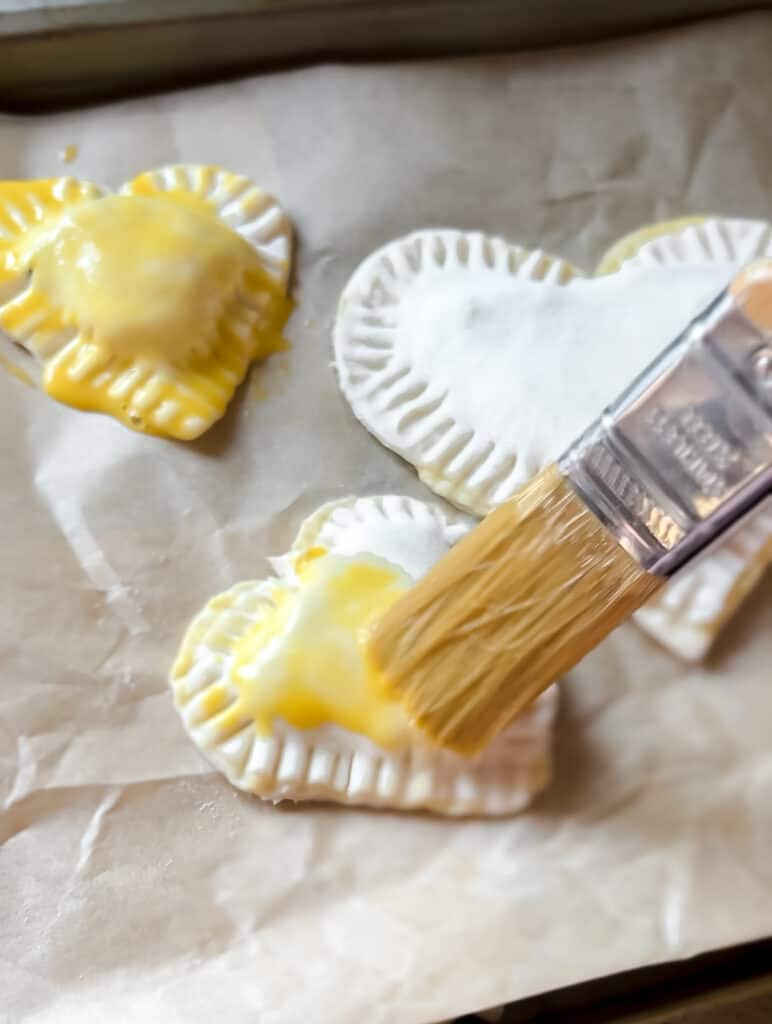
- Dip a pastry brush into the egg wash and gently paint the edges of your bottom layer of cut puff pastry. Lay a small slice of guava paste in the center of each piece of cut puff pastry. You can also mold the paste with your fingers to flatten and shape before placing in the center of the cut puff pastry.
- Spread a small dollop of the cream cheese on top of the guava paste (about 1 tablespoon cream cheese per cut puff pastry). Top with the second layer of cut puff pastry.


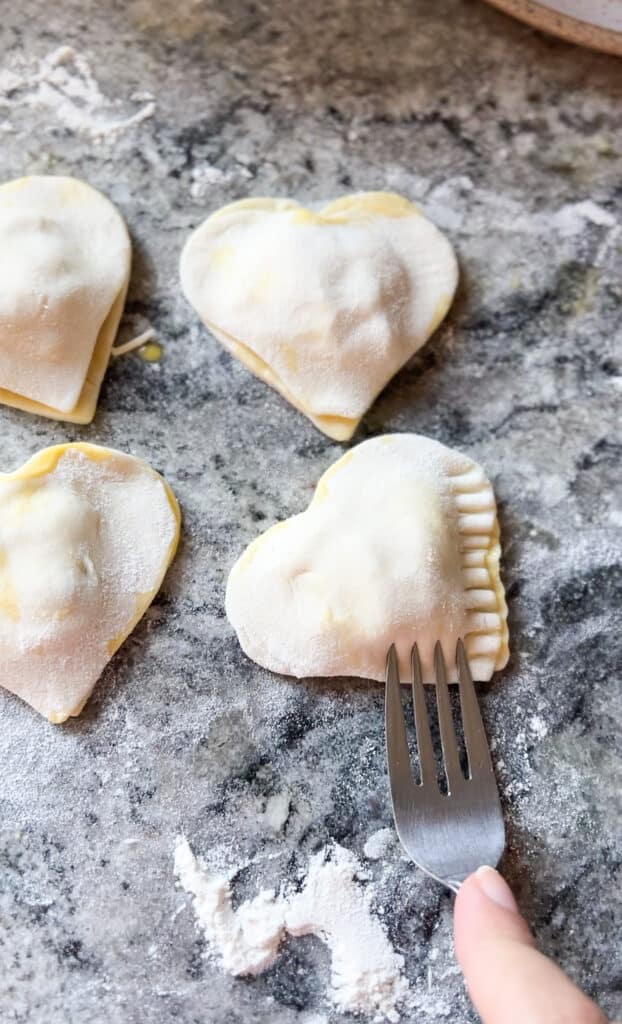
Using the side of your index fingers, press around and between the mounds of filling, pressing out any excess air, to glue the top puff pastry to the bottom.
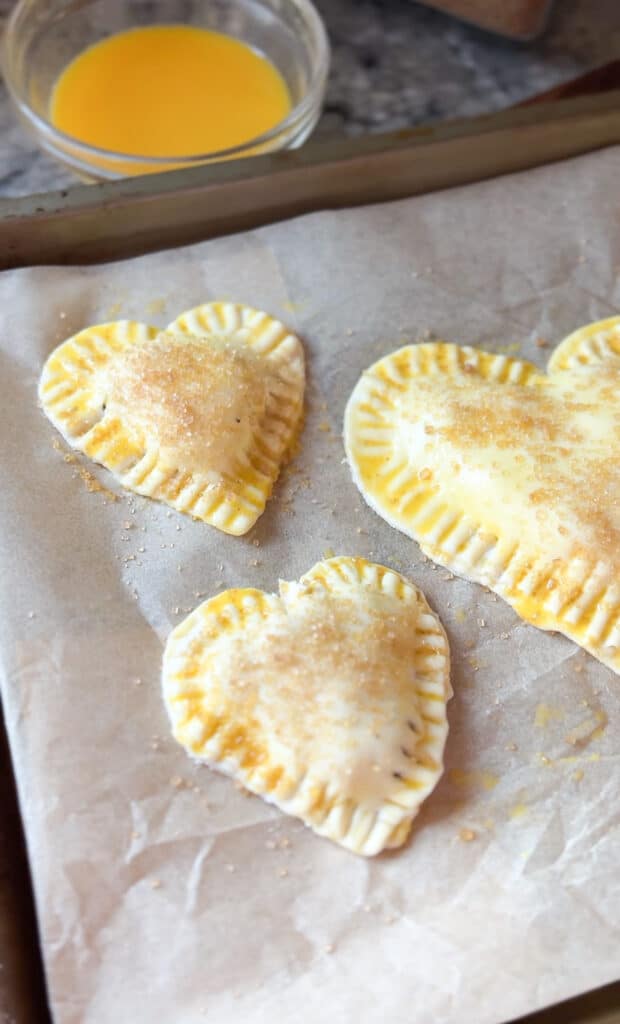
Using a fork, crimp the edges to seal the pastry together. Gently brush the top of each pastry with the egg wash. Sprinkle the surface with turbinado sugar.
Baking and Storing the Guava and Cream Cheese Pastries
Bake the guava and cream cheese pastries until puffed and golden brown, about 15 to 20 minutes. Serve warm or at room temperature.
If there are any uneaten pastries (a big IF), keep them in an airtight container for up to 2 days. They really begin to lose their crispy texture but can still be enjoyed the day after.

The Perfect Breakfast Pastry
After making these at home, I can see why my mom enjoys these. These are such a treat for the morning cup of coffee or tea and also make a lovely baked good to bring to gatherings. Once you've made these, you'll want to make them again and again.


Guava and Cream Cheese Pastries (Pastelitos)
Equipment
- 1 sheet of parchment paper
- 1 pastry brush
Ingredients
- 1 package of prepared puff pastry thawed, (Dufour Kitchens is my favorite brand to use here)
- ⅔ cup prepared pineapple guava paste* approximately 170 to 180g
- ⅔ cup cream cheese approximately 170 to 180g
- ½ teaspoon of ground cinnamon
- ½ teaspoon of Mexican vanilla extract
- ¼ cup turbinado sugar
Instructions
- Preheat oven to 375 degrees Fahrenheit. Line a rimmed baking sheet with parchment paper and set to the side.
- In a small bowl, prepare the egg wash by beating together the egg with a tablespoon of water and set aside. In a separate small bowl, mix together the cream cheese, cinnamon, and vanilla. Set to the side.
- On a lightly floured surface, roll one sheet of puff pastry into an 8-by-12-inch rectangle, about the size of a standard sheet of paper. If using cookie cutters, cut out your desired shapes and set aside on the parchment lined baking sheet. If not using cookie cutters, use a sharp knife or pizza cutter and slice the pastry into 8 rectangles, measuring approximately 3 x 4 inches (it’s okay if it’s not exact, just an estimate here). Place the cut puff pastry onto your parchment lined baking sheet. These will be the bottom layer of your puff pastry for the pastelitos.
- Repeat with the second sheet of puff pastry and keep on your floured work surface. These will be the top layers of your puff pastry for the pastelitos.**
- Dip a pastry brush into the egg wash and gently paint the edges of your bottom layer of cut puff pastry. Lay a small slice of guava paste in the center of each piece of cut puff pastry. You can also mold the guava paste with your fingers to flatten and shape before placing in the center of the cut puff pastry.
- Spread a small dollop of the cream cheese on top of the guava paste (about 1 tablespoon cream cheese per cut puff pastry). Top with the second layer of cut puff pastry.
- Using the side of your index fingers, press around and between the mounds of filling, pressing out any excess air, to glue the top puff pastry to the bottom. Using a fork, crimp the edges to seal the pastry together. Gently brush the top of each pastry with the egg wash. Sprinkle the surface with turbinado sugar.
- Bake the pastries until puffed and golden brown, about 15 to 20 minutes. Serve warm or at room temperature.
- Store any uneaten pastries in an airtight container for up to 2 days.

Leave a Reply