These 3 tips for wooden cutting board care will help keep an essential kitchen tool looking its best everyday. Today, I'm sharing how I clean and maintain the wooden boards I use for meal prep. From dicing veggies for soups to getting dinner ready in a flash, I use my wooden cutting board everyday. My cutting board and chef's knife are true workhorses in the kitchen.
Fun fact. I'm married to a woodworker. He designs serving boards and cutting boards and I'm lucky to have a few custom boards for meal prep. I asked him to also be our hand model today in showcasing the steps we take for board care.
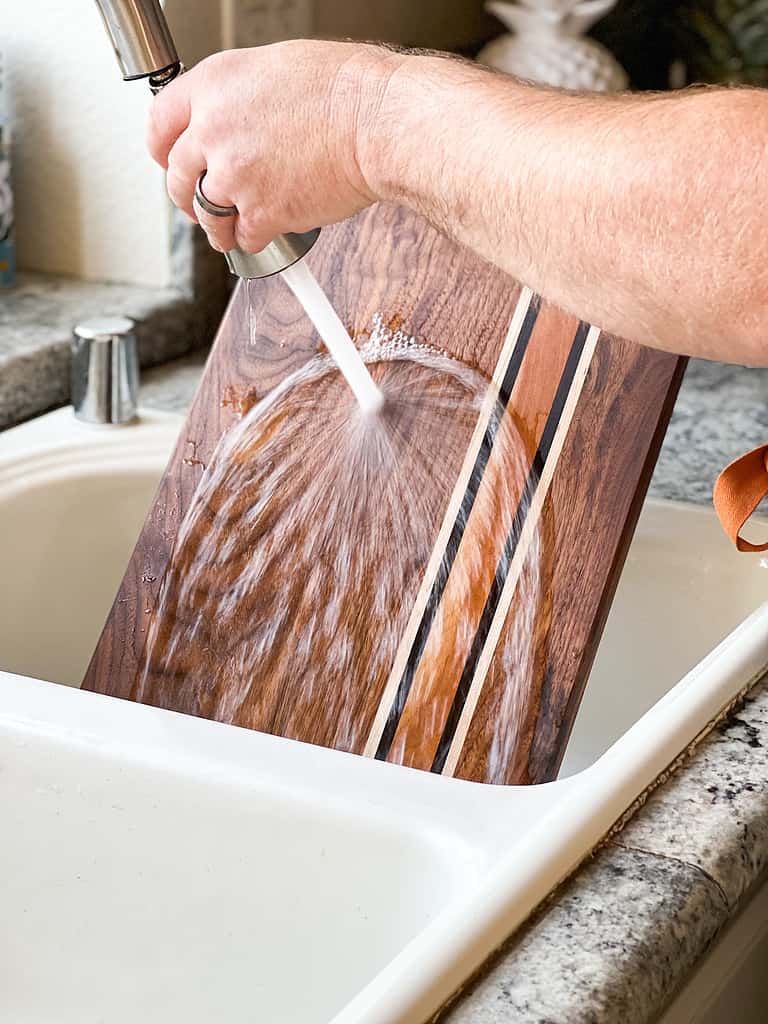
Board Care Tip 1: Always Hand Wash with Mild Soap and Water
After each use, wash your board by hand with warm, soapy water using mild dish soap.
It’s important to neither submerge your board in water for extended periods of time nor put your board in the dishwasher. This will warp the wood and cause damage.
On occasions where you have stains from certain fruits and vegetables, sprinkle a generous tablespoon of kosher salt and baking soda over the cutting board and squeeze out the juice of half a lemon to activate the acid-base chemical reaction to help neutralize odors and remove tough stains. Gently scrub and rinse. Repeat process as needed depending on how severe the stains are.
Board Care Tip 2: Dry Board Thoroughly After Each Wash
Use a clean hand towel or kitchen towel to dry your board after washing. Air dry completely before storing away until your next use.
Cutting boards can be stored in a location where you'll have easy access to it like your kitchen island or countertop. They make a beautiful display and home decor piece!

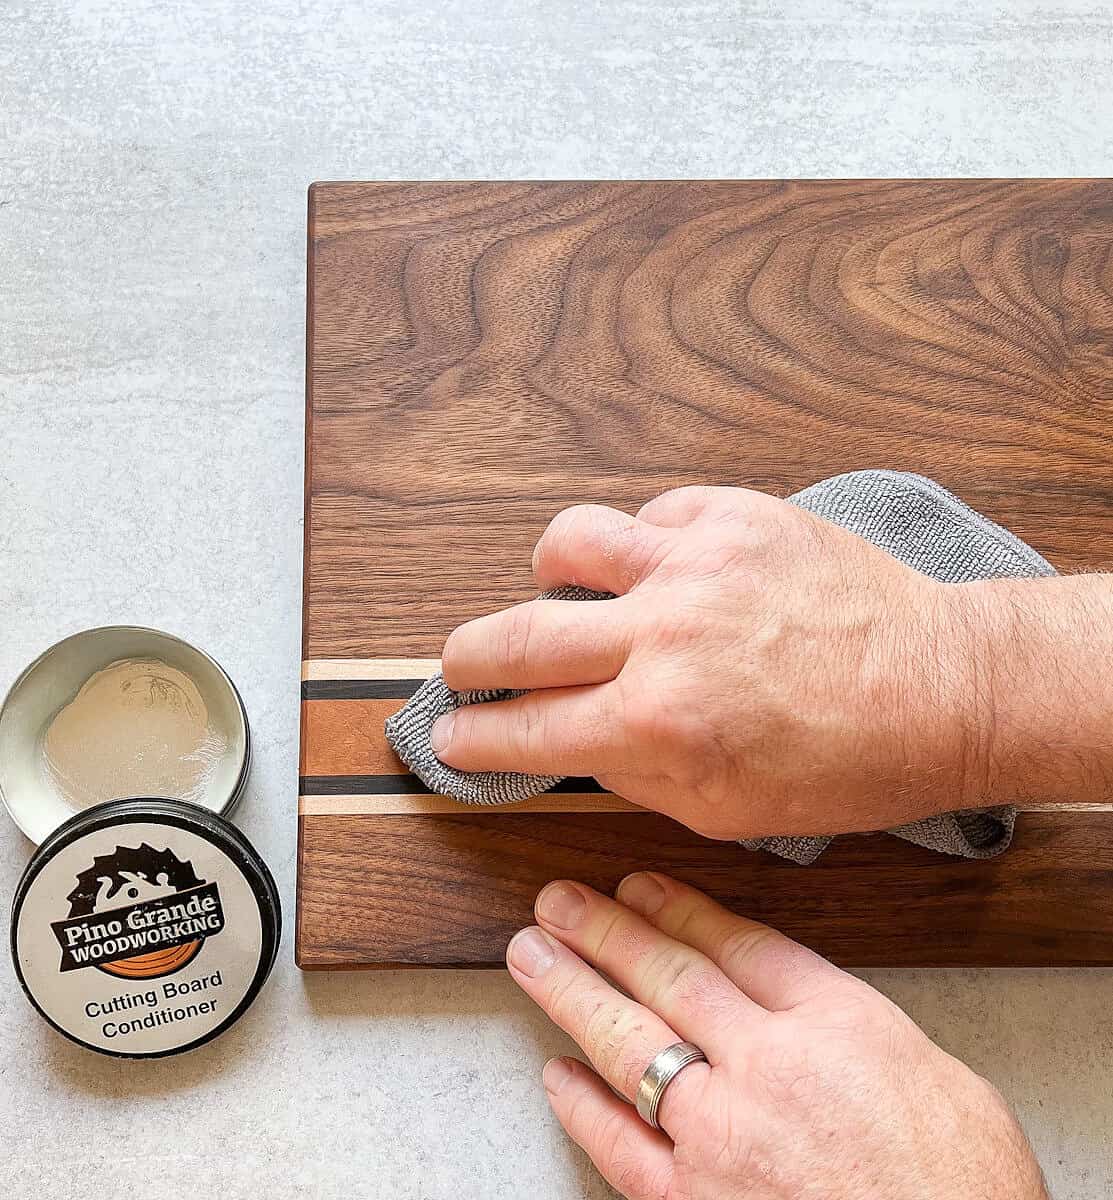
Step 3: Apply Board Conditioner as Needed
Board conditioner need not be applied daily. However, wooden cutting boards do require a level of maintenance to keep them looking their best everyday.
Once a month, apply a small amount of board conditioner or mineral oil to your board to help keep the wood of your board moisturized and seal it to prevent cracking using water-repelling beeswax. Using a clean cotton towel, apply conditioner with the grain of the board. Allow to fully dry approximately 30 minutes and then wipe off excess.
Store or display your board as you desire.
Ongoing Maintenance & Care
The above three steps are the ones I implement often to care for the boards I use. There are a few additional tips to keep in mind in instances where stains show or odors become stubborn to remove. Additionally, there are times where refinishing is needed. Read more below for cleaning solutions and when it's time to phone a professional.
Cleaning Solutions
You may notice that certain foods may leave an odor on your board, like onions and garlic, or even mild stains like beets and berries. You can clean a wooden cutting board with ingredients you likely already have on hand in your home: white distilled vinegar, lemon juice, baking soda, and kosher salt. Vinegar is an acetic acid that has been used as a disinfectant for generations. Make your own cleaning solution by mixing one part vinegar to four parts water and pour it over the cutting board. After letting it sit for a few minutes, simply rinse and then hand wash the board with soap and water. Mild dish soap also works well.
To clean a wooden board after cutting raw meat, hand wash the board right away using hot soapy water and follow up with the vinegar disinfecting solution.
Regular Board Care Maintenance
A few times a year (or more if the board is used heavily) re-finishing your board is recommended. You'll know it's time when your board appears dry to the touch, lighter in color, or feels slightly rougher around the grain. A light hand sanding using 150-grit sandpaper can help remove any rough texture or raised grains. Finish with a light coat of board conditioner and dry completely before storing.
When to Bring in a Professional
Every few years, especially if you have a cutting board that is in heavy use, the board may start to show its age. Dullness, lightness in color, rough patches, and deeper blade imprints are the visible signs. Having your board professionally refinished can restore its look and remove those rough edges to make meal prep easier.
Got questions about board care? Let me know in the comments below! And in the meantime, cheers to the next nourishing meal. ❤️


Leave a Reply