After 3+ years of Pizza Picnics I'm excited to finally share our steps for the best dough for the conventional home oven. The story of how Pizza Picnics came to be a weekly tradition is, in my view, a beautiful one. If you were following along on Instagram back in March 2020 you already know this story. But for those new to reading here, grab a cup of your favorite beverage and take a seat. This is a feel-good story of a weekly pizza night that arose from deeply uncertain times.

The Origin Story of Pizza Picnics
It was a Saturday. March 14, 2020. Schools closed for Spring Break a week ahead of schedule as COVID-19 case counts were rising steadily and our state announced Stay-at-Home orders. In an effort to make the weekend feel as normal as possible amidst not-normal news my husband and I decided "to do something fun." This was especially important given so many places were closed so we couldn't just go anywhere.
I personally find cooking to be that "something fun." A de-stressor of sorts. "Let's make pizza!" I said that morning as I figured we'd make the dough from scratch and pick up ingredients curbside at the store. Then the kids could put together their own pizzas.
Our oldest then had the idea of making a picnic out of it. We laid out the picnic blanket in our living room. The kids chose their favorite Disney movie at that time, Moana. And for a few moments the stressors of the world faded away as we cozied up over homemade pizza and a sweet movie.
And from that night: Pizza Picnics was born.
I started with a couple dough recipes I found online and we made our first homemade pizza dough balls. The kids would sporadically help prep the dough on Saturday mornings. We proofed the dough in our oven for at least 4 hours (it's usually the warmest spot in our house). When it's ready we top them and bake them. It's become the best weekly tradition that's now been a Saturday ritual for more than three and a half years, and counting, at the time of this post.

Still Going Strong: What Pizza Picnics Look Like Today
Pizza Picnics has now taken permanent standing on my menu plans for the week. Each week I plan our dinners and know pizza will be on the menu for Saturdays from now until the kids are grown and have flown the nest. And even then we may bring the tradition back for when the kids (and, God willing, grandkids) visit.
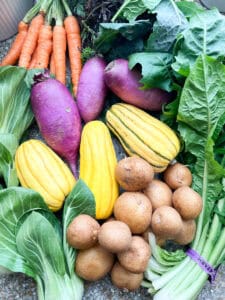
How do we keep this tradition going strong? Switching up the toppings. This is where I really lean into the premise of seasonal cooking. In keeping with the seasonal produce that comes in our weekly CSA box, I then brainstorm pizza ideas and recipes.
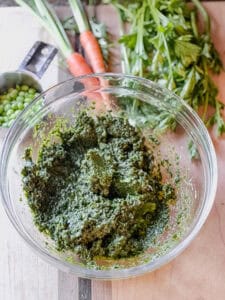
For spring, we'll see a good use of spinach and arugula pesto with a bit of burrata and prosciutto. In summer, we're layering fresh tomatoes with fior di latte and a roasted heirloom tomato sauce from garden ripe tomatoes and fresh basil from local farm stands. In fall, we're roasting up butternut squash to make a sauce and topping it with fresh mozzarella, Italian sausage, and fresno chiles. And in winter, we're using either freezer zucchini and basil pesto or marinara and adding in all sorts of fun toppings from caramelized onions to mushrooms and greens. How deliciously fun is that?


Our (Now) Family's Best Pizza Dough Recipe
High quality ingredients are paramount to really good pizza. From the flour to olive oil and even the cheeses we use for our toppings, great pizza starts with great ingredients. And after more than 3 years of weekly pizza dough prep, I've found a mix of flour, yeast, salt, and oil that works well for our home oven. And now I am finally sharing it with you here. Here's what our pizza dough is comprised of:
- 00 Flour: This type of flour is refined further than regular flour making it finer in texture. The finer mill of the flour leads to a more tender crust and it's perfect for the home oven pizza making adventures. When it comes to brands, Caputo's 00 Flour is our go-to here. We've used this flour since Day 1 of Pizza Picnics.
- All-purpose Flour: The combination of all-purpose flour and 00 flour pave the way to make the perfect pizza crust. We use King Arthur Baking brand for our all-purpose flour.
- Dry Active Yeast: Yeast is what gives our pizza crust the ubiquitous puff. The final product yields a chewy crust that gives us the best results for our desired toppings. Yeast is important here in making our pizza dough as it helps to break down the naturally occurring sugars in our dough. During the fermentation process, the yeast ferments and releases bubbles of carbon dioxide within the dough ball. This helps to create air bubbles creating a perfectly airy crust with a chewy texture. Gozney has a great guide on how to proof your pizza dough.
- Kosher Salt: Our seasoning here that adds flavor to our delightful ball of dough. Diamond Kosher Salt brand has been my go-to for the better part of a decade.
- Good Quality Extra Virgin Olive Oil: We need a good quality fat to help create a uniform crust, add great flavor and support the texture of the crust during the oven bake. Choose the best quality olive oil you can find as this is also a flavoring agent. California Olive Ranch is one in frequent use here.

Our Steps for the Best Pizza Dough for Home Oven Pizza Making
Pizza purists will definitely have their steps for the best pizza crust around. As pizza enthusiasts ourselves, these are our main techniques that have made a fundamental difference in the ways we prep the type of pizza we've made at home every weekend for more than 3 years now. This is our preferred method for preparing our pizza base. If you're new to making pizza at home, I encourage you to give our method a go and then look at the ways you can make different kinds of pizza to suit your tastes and preferences.
Step 1: Mix the Dry Ingredients
Begin by mixing together the 00 flour, all-purpose flour and kosher salt in a large mixing bowl.
Step 2: Mix the Wet Ingredients
In a separate small bowl, add the lukewarm water and olive oil. Sprinkle the dry active yeast over the oil and water mixture. Allow it to sit and begin to bubble for a minute or two. Give the mixture a gentle mix and add to the large bowl of mixed flour and salt. Next, using your hand(s), mix it all together. Transfer the dough to a lightly floured work area. Begin to knead the dough for about 3 minutes until it forms a rough ball. Allow dough to rest for 15 minutes uncovered.


Step 3: Knead the Dough then Proof for at Least 4 Hours
Add enough flour to the floured surface and knead the dough once more for another 3 minutes. Using the palm of your hand (right hand or left hand based on personal preference), press the dough down in the center of the dough on your work surface and away from yourself. Bring the outer edge back towards the center of the dough to fold. Then repeat. You want to stretch the dough, not just press it down, as you knead it.
Once formed into a smooth and perfectly round shape, it's time for the dough rest. Place the dough balls on a cutting board or rimmed baking sheet lined with parchment paper that's been dusted with a little flour to prevent the dough from sticking to the parchment paper. Lightly cover the dough balls with a floured clean linen towel and place in the warmest spot in your home to allow the dough rise and proof process. Alternatively, you can proof your dough balls in a proofing box with lid. Proof the dough for at least 4 hours at room temperature or for up to 8 hours in the refrigerator.

Step 4: Shape Your Thin Crust Pizza, Top and Bake
Remove the cold pizza dough from the refrigerator or from the room temperature area where the dough proofed. If removing from the refrigerator, allow the dough to come to room temperature for at least 15 minutes to avoid dough tears when shaping your thin-crust pizzas. Home cooks / pizza enthusiasts and expert pizza makers will agree: the best way to form and stretch pizza dough is with our hands. Add as much flour to your work surface as needed to prevent the dough from sticking. Taking one dough ball at a time and, using your hands, place the dough ball on the work surface and gently stretch the dough to form a circular shape for the crust.
A common mistake when forming the crust is pulling on the dough too fast causing it to tear. You can avoid this by allowing the cold dough to come to room temperature and gently shape the dough with your hands to form light dough stretches until the crust is formed to the right size and desired shape you want. Begin layering your chosen sauce and toppings then bake for about 15 minutes in a 475 degree Fahrenheit oven until the edges are crisp and golden.
All the Pizza FAQ
This pizza dough recipe is the one we use religiously each week. That said, there are a number of questions I'm asked pretty frequently that I wanted to share here:
- Can I also use a pizza stone during the bake? Yes! I typically like to use this pizza pan which can still get a crispy crust on the bottom. If using a pizza stone, follow manufacturer guidelines. One that I can recommend is this one from Sur La Table. It's 14.5" diameter will fit this pizza dough recipe. You'll likely want to use a pizza peel too to help remove it from the pizza stone.
- Does this recipe work for an outdoor pizza oven? Honestly, the cooking process for hand-stretched pizza dough will differ greatly in an outdoor pizza oven because the temperatures are almost double what we get in our conventional oven. I haven't tested this recipe for an outdoor pizza oven so I can't say for sure since I don't currently own one. A good starter recipe if wanting to use an outdoor pizza oven would be this one. The crust will cook within mere minutes and definitely rivals any store-bought pizza dough!
- Can I freeze the dough? Absolutely! I've done this often to make a batch of warm dough and then freeze it for future use. For best results, plan to keep them frozen for up to about 3 months giving us plenty of time to plan that next New York-style pizza party.

The Best Pizza Dough Recipe for Your Home Oven
Ingredients
- 160 g 00 Flour
- 160 g all-purpose flour
- 10 g kosher salt
- 2 g dry active yeast ¾ teaspoon
- 4 g good quality extra virgin olive oil
- 210 g lukewarm water
Instructions
- In a large mixing bowl, use your hands to mix the 00 flour, all-purpose flour, and kosher salt together until well mixed.
- In a small bowl, add the lukewarm water and olive oil. Sprinkle the dry active yeast over the oil and water mixture and allow to sit and begin to bubble for a minute or two. Give the mixture a gentle mix and add to the large bowl of mixed flour and salt.
- Using your hand(s), mix it all together and begin to knead the dough for about 3 minutes until it forms a rough ball. Allow dough to rest for 15 minutes uncovered.
- Remove dough ball to a floured work surface and knead the dough for another 3 minutes until smooth and pliable. Cut the dough ball into two small equally sized dough balls. Place the dough balls on a heavily floured surface (I use a flour parchment lined baking sheet). Cover with a dampened linen cloth and allow dough to rest at room temp for 4 hours until doubled in size. Alternatively, the dough can rest in the refrigerator for 8 hours (up to 24 hours). If refrigerating, make sure to take out dough balls 30 to 45 minutes prior to using for pizza making.
- Prepare two 12-inch pizza pans by greasing them with a little olive oil and a sprinkling of semolina or polenta. This will prevent the crust from sticking in the oven during the bake.
- To make your pizza, hand stretch each dough ball above the prepared pizza pans. Moving the dough in a circular motion as if turning a wheel, stretch it out gently until it’s roughly 12-inches in diameter. Place the hand stretched crust on the prepared pizza pan. Finish forming the crust by stretching its edges towards the outer rim of the pizza pan. Once crust is stretched, top with desired sauce, cheese, and any additional toppings.
- Bake the prepared pizza in a 475 to 500 degree Fahrenheit oven for approximately 13-15 minutes until the crust edges and bottom of the crust are golden brown and crispy.
Leave a Reply